
I'll just write a paragraph about some of the things I learned in rails. The first half of my ruby journey was all about fundamentals. First, I learned how to talk to a computer with the command line. Then I got started on specific programming concepts in Ruby, learning about data types, variables, booleans, input/output, and nil. I learned how to control the way my programs execute by modifying their flow and practicing looping and arrays and working with lists. I then learned about symbols, which allow me to save information in a less changeable way, and hashes, which, like arrays, allow me to store data in a collection together. I also practiced manipulating simple data structures to extract the information from them I needed.
In the second half, I kept learning about Object Oriented Programming by writing classes that interact with each other. I learned about code organization and used Modules and Object Inheritance. Finally, I . learned the fundamentals of the HTTP Request/Response cycle and used it to create Web Applications. I learned how to generate dynamic views with user generated content, how to receive data as POST Requests from users and how to write Acceptance Tests for Web Applications.
testing summary;
start with print of a basic error
start with more complicated manual stuff like pry
easy eaxmple from week 2 showing checking a boolean -easy pry example from beginning(showing list that you break open w pry from week 4)
harder pry example of breaking into server activity, testing wk 13, how do you know where to put the pry and how to identify the variable you need to break into? (ask nate and jim)
then you can use automated testing-
once you have as server and have a webpage; you don’t need to fill out your forms
-for both of us, attached
ALSO SEE MY INDIVICUAL ARTICAL I WROTE ABOUT IT, TOOK ME ANOTHER 5 HOURS AND ADDED MORE INFORMATION ABOUT SEO:LESLIE'S WORDPRESS ARTICLE ON MEDIUM
I sometimes hang out in my girlfriends room and feel an inexplicable sense of anxiety clawing its way up my back. Upon reflection of when this mysterious feeling tends to occur, I realized the other day that it only happens when the ambient room temperature sinks to below 74 degrees fahrenheit. My theory is that my body starts shutting down at 73.9 F and preparing for death. Thus my final arduino project is an attempt to save myself from that fate.
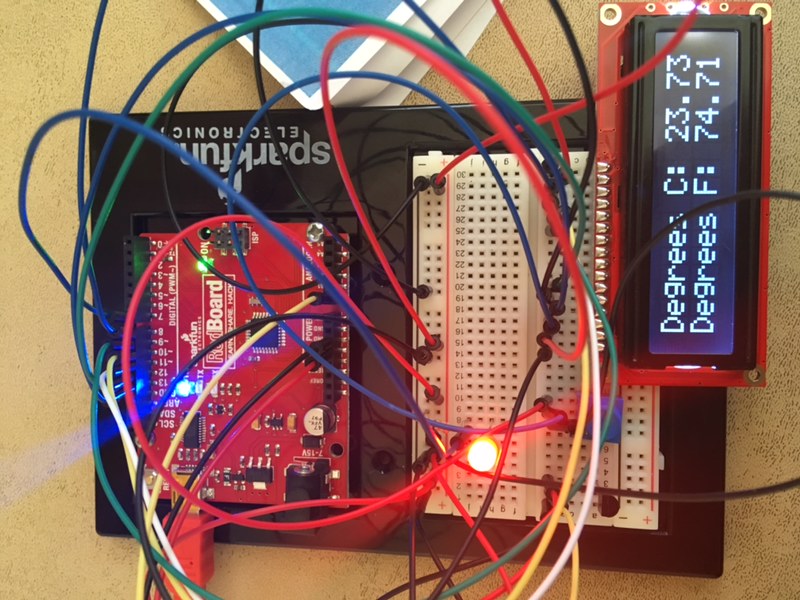
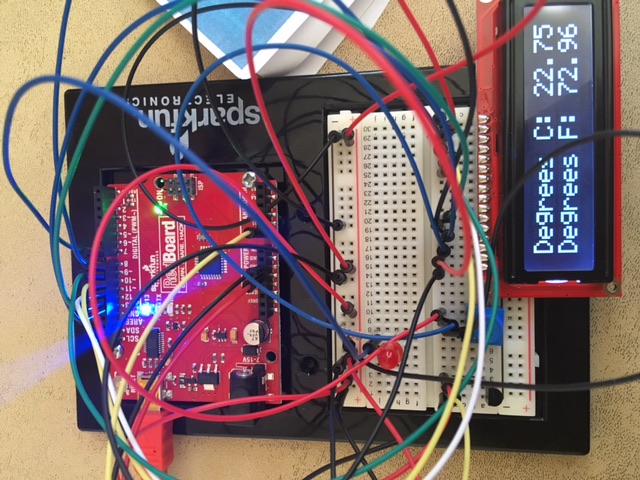
I arranged circuits such that a light would turn off anytime the ambient temperature goes below that which is safe for my survival. In order to get such a warning I used the basic Circuit 4B - Temperature Sensor code and referred to other projects in the book to figure out some alternate placement for my warning flash.
(see below 74 circuit diagram attached) 
(see above 74 circuit diagram attached) 
I ran into some snags such as one wire here or there being misplaced and causing the led display to make funny images that I suppose meant it was shorting out. Of course as I was experimenting with where to place the light and wires there were several instances in which it simply didn’t turn on. It occurred to me that it would be helpful to know how to debug as things like this get more complex.
I’d say getting some of the basic code to make the light work wasn’t hard to insert into the preexisting Circuit 4B code. I did have to look up C syntax, though.The curly brackets were a little hard to get used to (wasn’t sure I needed to have two of them in an if/else statement, different from ruby). All in all I’m pretty sure my new gadget is going to save my life, thanks to Jim for showing me how to do this nifty stuff.
#include <LiquidCrystal.h>                 //the liquid crystal libarry contains commands for printing to the display
LiquidCrystal lcd(13, 12, 11, 10, 9, 8);    // tell the RedBoard what pins are connected to the display

float voltage = 0;                          //the voltage measured from the TMP36
float degreesC = 0;                         //the temperature in Celsius, calcuated from the voltage
float degreesF = 0;                         //the temperature in Farenheit, calcuated from the voltage

void setup() {

  lcd.begin(16, 2);                         //tell the lcd library that we are using a display that is 16 characters wide and 2 characters high
  lcd.clear();                              //clear the display
  pinMode(7, OUTPUT);      // Set pin 17 to output
}


void loop() {

  voltage = analogRead(A0) * 0.004882814;   //convert the analog reading, which varies from 0 to 1023, back to a voltage value from 0-5 volts
  degreesC = (voltage - 0.5) * 100.0;       //convert the voltage to a temperature in degrees Celsius
  degreesF = degreesC * (9.0/5.0) + 32.0;   //convert the voltage to a temperature in dgrees Fahrenheit

  if(degreesF >=74){

  digitalWrite(7, HIGH);}   // Turn on the LED
  else{
  digitalWrite(7, LOW);    // Turn off the LED
  }

  lcd.clear();                              //clear the LCD

  lcd.setCursor(0,0);                       //set the cursor to the top left position
  lcd.print("Degrees C: ");                 //print a label for the data
  lcd.print(degreesC);                      //print the degrees Celsius

  lcd.setCursor(0,1);                       //set the cursor to the lower left position
  lcd.print("Degrees F: ");                 //Print a label for the data
  lcd.print(degreesF);                      //print the degrees Fahreheit

  delay(1000);                              //delay for 1 second between each reading (this makes the display less noisy)

}
![[paper clip]](/cours/static/images/paper_clip_tilt.png)
| last modified | size | ||
| Wordpress-Reflections.pdf | Tue Jul 28 2026 12:32 am | 1.8M | |
| above_74.jpeg | Tue Jul 28 2026 12:32 am | 148K | |
| below_74.jpeg | Tue Jul 28 2026 12:32 am | 139K |
