blink
An LED is a very simple form of output. It is low enough power to be driven directly from the ATtiny and you probably already have one.
Knowing how to blink an LED can be extended to turn off and on the state of a buzzer very quickly to make noises, taking microsecond pauses between each state flipping.
To get an LED blinking, we need a few things:
The Code
First, we'll look at what blink.c looks like.
It is heavily commented as to provide semi-insightful information to the workings of the program.
/* blink.c - blink led example
 * run '$ make' to check for erors,
 * '$ make writeflash' to compile and upload
 */

// Define clock speed for delay.h:
// (8MHz internal crystal; /8 prescaler):

//We're running the chip at an eighth its max clock speed. 1 MHz instead of 8 MHz
#define F_CPU 1000000L

#include <avr/io.h> //imports all of the many many define statements and function declarations from avr/io.h
#include <util/delay.h> //

//This defines an alias for PB1.
//When the program compiles, replace all instances of LED with PB1 (defined already in avr/io.h)
#define LED PB1

void delay(int ms) { //defining a function to delay for a number of milliseconds.
  int i;
  for (i=0; i<ms; i++) { //delay ms milliseconds
    _delay_ms(1);
  }
}

int main(void){ //All C programs need a main loop.
  // Setup :
  //in the DDRB register (determines whether or not something is
  //an input or an output) set the pin defined as LED high (an output)
  DDRB |= (1<<LED);

  // Start it high:
  //The PORTB register determines the state of an output pin.
  //This starts the state high before we enter the while() loop.
  PORTB |= (1<<LED);
  //--
  // Main:
  while (1) {
    // Wait 1 sec:
    delay(1000); //delay 1000ms or 1 second.
    // xor to toggle LED state:
    PORTB ^= (1<<LED); //toggle the state of the LED pin with a bitwise XOR.
  }
  return 0;
}
If you've gotten to this point, it is assumed you have followed either
this or
this and that your programmer is cooperating.
Prototyping
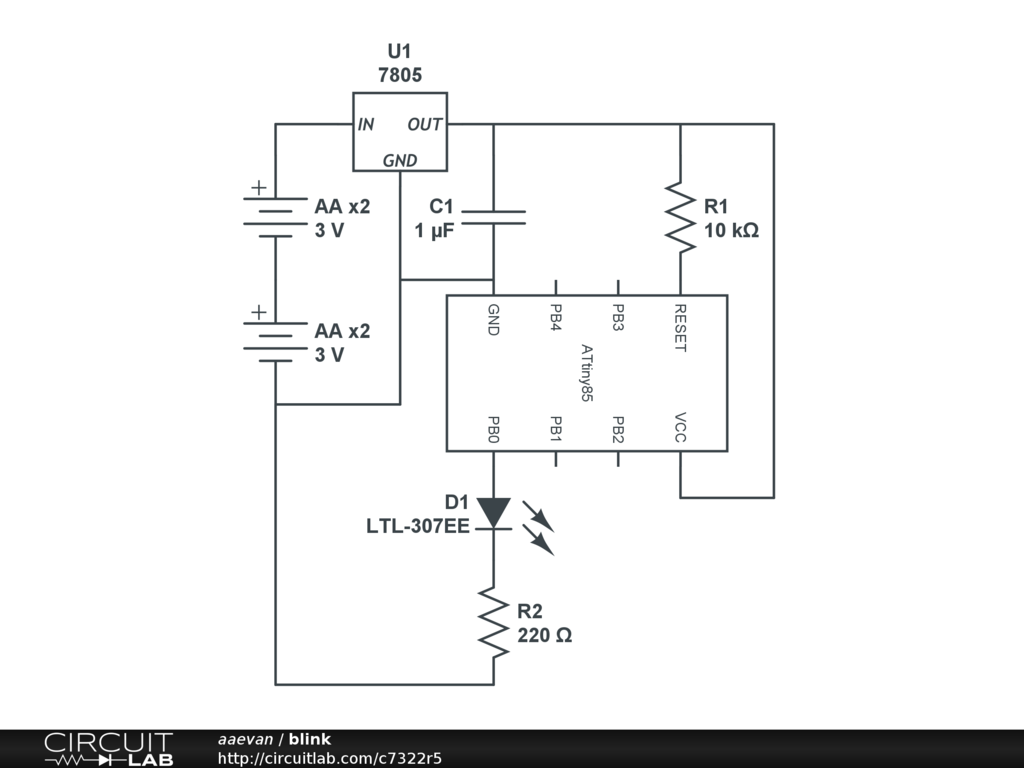
The ATtiny85 doesn't need much in the way of life-support. We only really need a resistor across the reset and a moderately noise-free power supply.
The 7805 voltage regulator and the .1 microfarad capacitor work in tandem to provide a relatively smooth output. The battery pack starts at 6V but needs to be dropped down to around 5V for the ATtiny to handle it.
 (errata: I meant 7805 not 7804
From there, we can follow this handy diagram(!):
From there, it's fairly easy to put the parts on a breadboard (
using a breadboard):
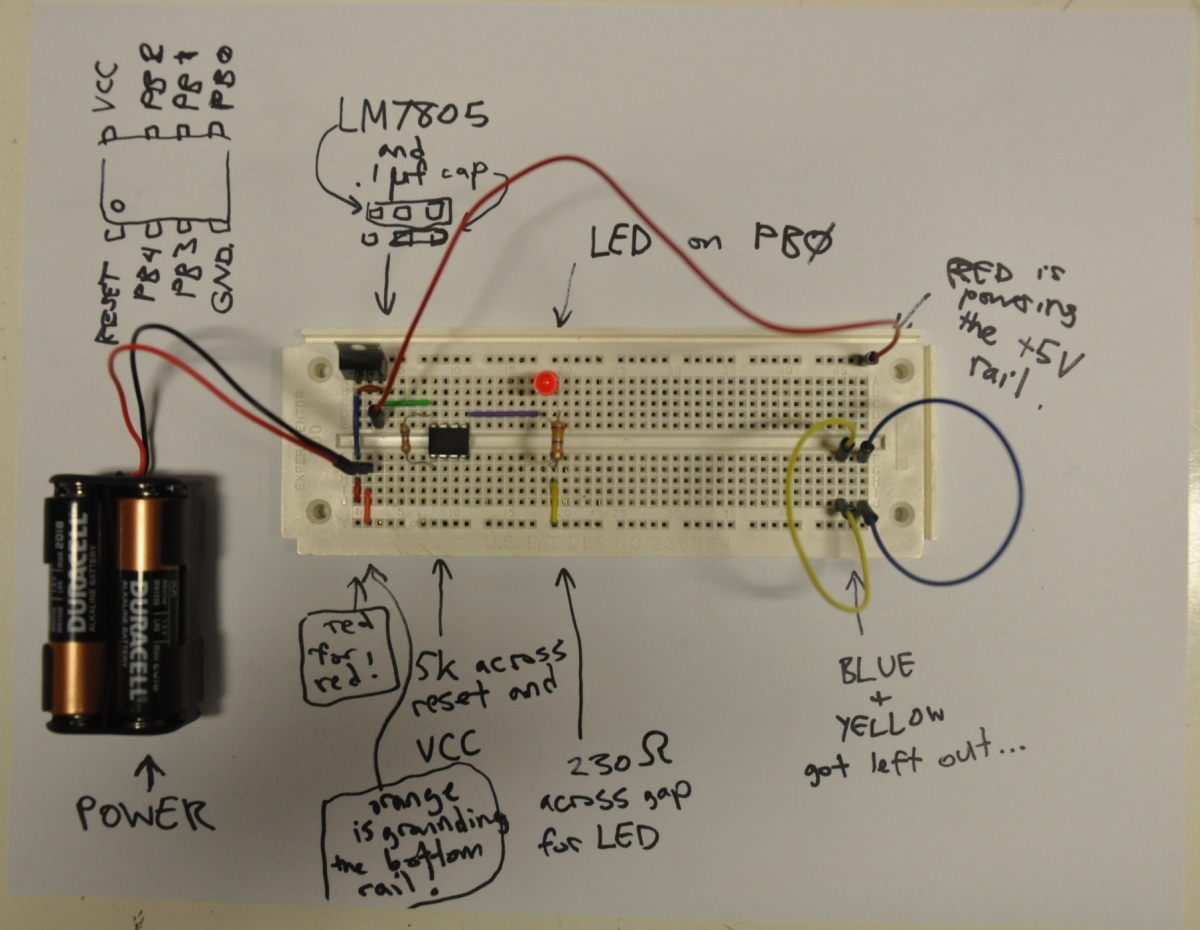
(errata: the middle pin of the 7805 needs to be grounded and the bottom right (GND) pin needs to connect to the bottom rail.)
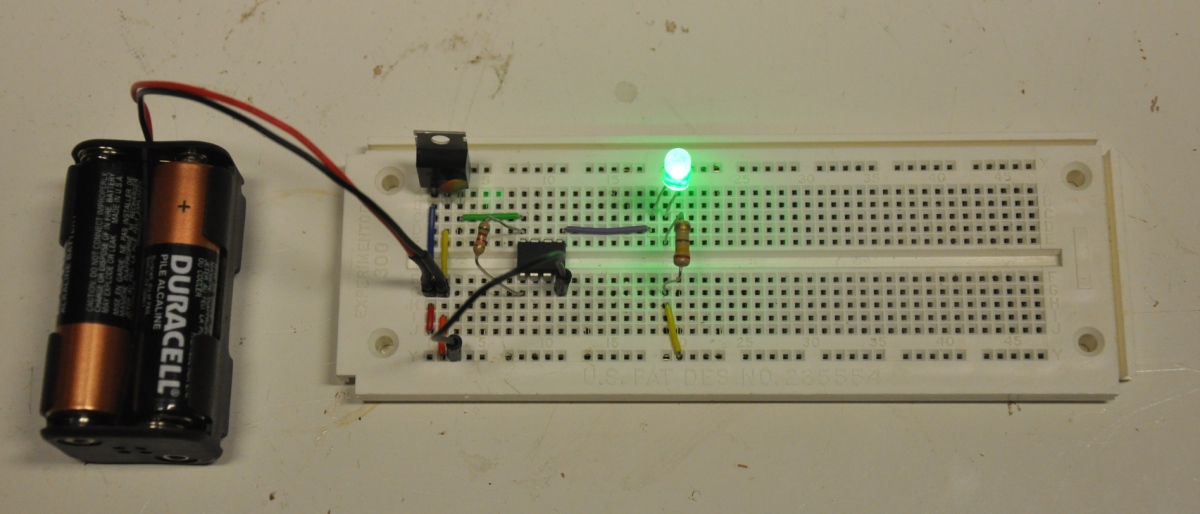
... and here's a slightly cleaner version of the breadboard minus my sharpied comments:
But wait... there's more!
I've attached a short
video of blink.c working.
What can we do with this?
To setup an LED, we first need a pin to be designated as an output
DDRB |= (1<<LED);
and then the pin's initial state to be set, on or off.
PORTB |= (1<<LED);
Having more things blink is as simple as defining more pins and setting their initial states.
The new file looks like this:
/* blink.c - blink led example
 * run '$ make' to check for erors,
 * '$ make writeflash' to compile and upload
 */

// Define clock speed for delay.h:
// (8MHz internal crystal; /8 prescaler):
#define F_CPU 1000000L

#include <avr/io.h>
#include <util/delay.h>

#define LED PB0

void delay(int ms) {
  int i;
  for (i=0; i<ms; i++) {
    _delay_ms(1);
  }
}

#define LED1 PB0 //we can define up to 5 digital inputs.
#define LED2 PB1
#define LED3 PB2
#define LED4 PB3
#define LED5 PB4

int main(void){
  //setup
  DDRB |= (1<<LED1); //set as an output
  DDRB |= (1<<LED2);
  DDRB |= (1<<LED3);
  DDRB |= (1<<LED4);
  DDRB |= (1<<LED5);

  PORTB &=~(1<<LED1);//start off
  PORTB &=~(1<<LED2);// ""
  PORTB &=~(1<<LED3);
  PORTB &=~(1<<LED4);
  PORTB &=~(1<<LED5);
  int delay_time=100;
  //main loop
  while(1){
    delay(delay_time);
    PORTB = (1<<LED1); //turn on -just- LED1
    delay(delay_time);
    PORTB = (1<<LED2); //set the new state of PORTB to be -just- LED2 on.
    delay(delay_time);
    PORTB = (1<<LED3); //wash rinse repeat...
    delay(delay_time);
    PORTB = (1<<LED4);
    delay(delay_time);
    PORTB = (1<<LED5);
    delay(delay_time);
    PORTB = (1<<LED4);
    delay(delay_time);
    PORTB = (1<<LED3);
    delay(delay_time);
    PORTB = (1<<LED2);
     }
  return 0;
}
click for video

Next...
So we can get We make the ATtiny read a switch.

![[paper clip]](/courses/source/wiki_images/paper_clip_tilt.png)